
Most attics fail from the top plate up, not from thin insulation. Air leaks around wires, pipes, and the hatch carry heat and moisture past the insulation all winter, then summer heat drops straight through the same gaps. The fix is sequence, not thickness. Attic insulation installation is the sequenced process of sealing air leaks, preserving ventilation, then adding insulation to target R-value without creating moisture or fire risk.
What Attic Insulation Installation Requires Before You Add a Single Batt
Attic insulation performance depends on installed depth of 10 to 14 inches for R-38 to R-49 when the attic stays vented and the ceiling plane is fully sealed. That is the whole job in one sentence. You are building an air barrier first and a thermal blanket second, inside a roof assembly that still needs to breathe at the eaves and ridge.
If your attic floor now shows joists with patchy old fill, you are a good candidate for a top-up. If you see stained sheathing, wet batts, or daylight around the chimney chase, stop and fix moisture and flashing first. For background on how material choice fits this sequence, read the what is home insulation guide before you buy bags or book a blower.
Set expectations with numbers. The IECC and DOE point most US homes toward R-38 to R-60 at the attic floor: R-38 in zones 1 to 3, R-49 in zones 4 to 5, R-60 in zones 6 to 8. Blown fiberglass needs roughly 12 to 20 inches for that range; blown cellulose needs roughly 10 to 16 inches. The insulation R-value guide maps those targets by zone so you can confirm your number before you start.
Safety comes before savings here. Wear a P100 or N95 respirator plus eye protection, gloves, long sleeves, and knee pads. Attics are hot, dark, and full of trip edges. Work in the cool morning, bring a bright headlamp and a partner who knows you are up there, step only on joists or walk boards, and stay hydrated because attic heat can push past 120 degrees F. If you find knob-and-tube wiring or crumbling cloth-covered cable, do not touch it and consult a licensed electrician before adding any insulation around it.
How Attic Air Sealing and Ventilation Decide the Final R-Value
Air sealing effectiveness determines real R-value within 20 to 40 percent of label when attic bypasses stay open during heating season. Insulation slows conduction. Only sealing slows convection through the gaps. The IRC (Chapter 11 and R806 for roof ventilation) assumes both work together, which is why inspectors and energy auditors both start at the attic plane, not at the insulation aisle.
Walk the attic with a headlamp and mark every penetration with painter tape: plumbing stacks, wire drops, fan housings, the chimney chase, the hatch perimeter, and the top plates of every wall. Seal small gaps under 0.5 inch with fire-rated caulk, larger gaps with expanding foam, and large chases with cut rigid foam sealed at the edges. Keep foam and caulk at least 3 inches from masonry chimneys and use sheet metal plus high-temperature sealant there per IRC clearance rules.
Ventilation baffles come next and they are not optional in a vented attic. Each rafter bay with a soffit vent gets a baffle that holds a 1-inch vent channel from the soffit past the insulation line to the open attic. Staple the baffle to the roof deck, seal the side edges so blow-in cannot spill behind it, and confirm daylight at the soffit after install. Without that channel, insulation drifts against the sheathing, blocks intake air, and wets the roof deck in cold climates. Ridge, gable, or powered exhaust vents handle the outlet side; your job is to protect the inlet path.
Lights deserve their own pause. Modern IC-rated cans may be covered with insulation; older non-IC cans need a 3-inch clearance box and must never be buried. If you cannot read the IC label from the attic side, treat the fixture as non-IC and consult a licensed professional. For help choosing between fiber and foam around tricky details, compare options in the fiberglass versus spray foam insulation comparison.
Blown-In Versus Batt Placement: Choose by Attic Shape and Access
Blown-in cellulose coverage reaches R-49 at about 13 inches deep when installed over a sealed attic floor with baffles intact. That even fill is why auditors favor blow-in for open attics: the hose finds every corner, covers plates and cross-bracing, and builds depth without seams. Fiberglass blow-in behaves similarly at slightly lower density per inch, usually needing 1 to 2 inches more than cellulose for the same R.
Fiberglass batts win in small, boxy attics with full standing room and simple joist runs, and they win for homeowners who want a no-machine weekend job. Lay the first layer snug between joists without stretching or stuffing, split batts around wires instead of draping over them, then run the second layer perpendicular across the joists to break thermal bridging. A compressed 6-inch batt stuffed into a 4-inch space does not give R-19; compression plus side gaps can cut effective value by 15 to 30 percent, which is exactly why the R-value on the package assumes full loft and full contact on all six sides.
Mineral wool batts sit between those two: denser, stiffer, and more fire resistant at higher cost per sq ft. Use it where the attic doubles as a mechanical platform. Use blow-in where the attic is irregular or full of cross-bracing.
Choose blow-in if the attic is vented, open, and deeper than 100 sq ft, because coverage speed and seam-free depth outweigh bag cost. Choose batts if the space is cramped or partly floored for storage. Choose spray foam at the roofline instead if the attic will be conditioned or holds HVAC equipment; that moves the thermal boundary to the sheathing and follows a different code path for ignition barriers.
Attic Insulation Steps With Tolerances for Depth, Dams, and Markers
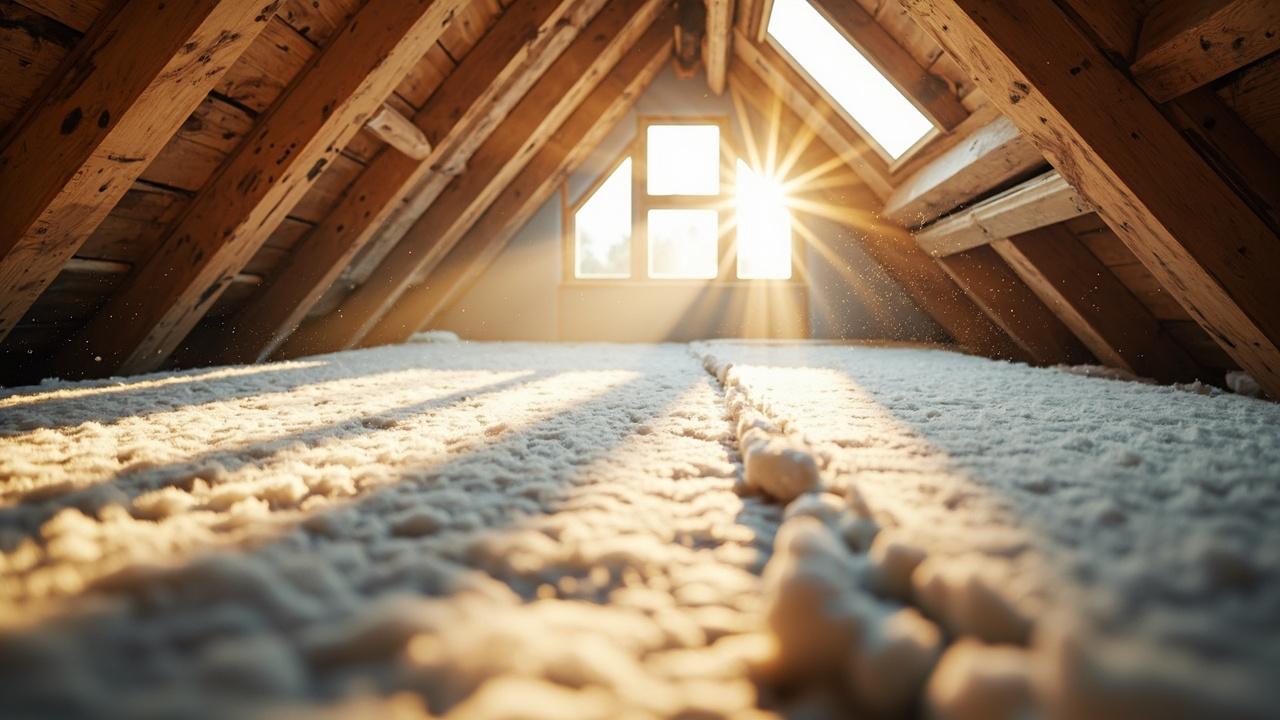
Depth markers accuracy holds final R-value within 10 percent when rulers stand every 100 sq ft across the attic. This is the step sequence professionals follow, and the tolerances are what separate a one-winter job from a twenty-year assembly. Gather the blower, baffles, rulers, hatch framing lumber, rigid foam for the dam, caulk and foam sealant, walk boards, and protective gear before you climb up.
- Clear and inspect. Move stored boxes out, lay walk boards across at least two joists, and probe old insulation for damp spots or droppings. Remove wet or contaminated sections wearing gloves and respirator; dry, clean, odor-free old fill can stay as the base layer.
- Air seal the ceiling plane. Seal wire and pipe penetrations, top plates, fan housings, and the hatch frame with caulk or foam. Box the chimney chase with sheet metal and high-temperature sealant, keeping insulation 2 inches from masonry and 3 inches from metal flue unless the listing says otherwise. Budget a full morning for this; it is the highest-return labor in the project.
- Install baffles and rulers. Fit a baffle in every vented rafter bay, hold the 1-inch vent channel open from soffit to attic, and staple plus edge-seal each chute. Staple or glue depth rulers to joists so every 100 sq ft has a visible gauge, with ruler tops set to your target depth (for example 13.5 inches for R-49 cellulose per bag chart).
- Build the hatch dam and walkway. Frame an attic hatch dam around the opening with plywood or rigid foam board so the finished dam stands 2 inches above final insulation depth. Weatherstrip the hatch lid, glue 2 to 4 inches of rigid foam to its back for R-13 to R-26, and keep a plank walkway from hatch to equipment so nobody ever steps into fresh blow-in.
- Shield heat sources. Fit 3-inch clearance boxes around non-IC recessed lights, keep insulation off hot flues and non-IC housings, and confirm bath and kitchen ducts exhaust outdoors through insulated duct, not into the blow-in. When labels are missing or wiring looks brittle, stop and consult a licensed professional rather than guessing.
- Blow or lay to depth. Start at the far eaves and work back toward the hatch so the hose never drags through fresh fill. For batts, fill between joists first, then cross-lay the second layer perpendicular with tight joints. Check rulers as you go; add half an inch for settling if the bag chart calls for it.
- Verify and document. Photograph rulers, baffles, dam height, and light clearances. Measure depth in six to ten spots, fluff low areas, and confirm soffit vents still show daylight. Log bag count against the coverage chart so the final R matches the label math, per IECC Table R402.1.3 expectations for your zone.
Expect a 1,000 sq ft attic top-up to take one day for sealing plus half a day for blowing with a two-person crew, at roughly $1.00 to $1.80 per sq ft for machine blow-in or $0.70 to $1.30 per sq ft for DIY batts before sealant and dam materials.
Common Mistakes and Limits That Erase R-Value or Create Hazards
IECC climate zones set R-38 to R-60 at the attic floor when the assembly is vented, sealed, and dry throughout the year. Miss any of those three conditions and the chart number means little. These are the failures auditors photograph most, and each one has a simple prevention habit.
Blocking soffit vents ranks first. Insulation pushed to the eaves without baffles chokes intake air, wets the nail line in winter, and can rot the lower sheathing within a few seasons. Prevention is the 1-inch vent channel in every vented bay, verified by daylight before blowing. Burying non-IC housings ranks second and it is a fire risk, not just an energy loss. Keep the 3-inch clearance, use listed covers where allowed, and consult a licensed electrician when the rating label is gone. Compressing batts ranks third: stuffing, stretching over wires, or double-layering in one direction leaves voids and thermal bridges. Split around obstructions and cross-lay the cap layer instead.
Skipping bypass sealing ranks fourth and it quietly halves the payback. Wind washing through edge batts and stack effect through open chases move more heat than thin spots ever do. Seal first even if it costs a weekend, because no depth compensates for a leaky plane.
Know when this project is not a DIY job. Active roof leaks, widespread mold, sagging sheathing, or vermiculite that may contain asbestos all call for remediation before insulation. Electrical work beyond a listed light cover or spray foam at the roofline under IRC ignition-barrier rules also means consult a licensed professional.