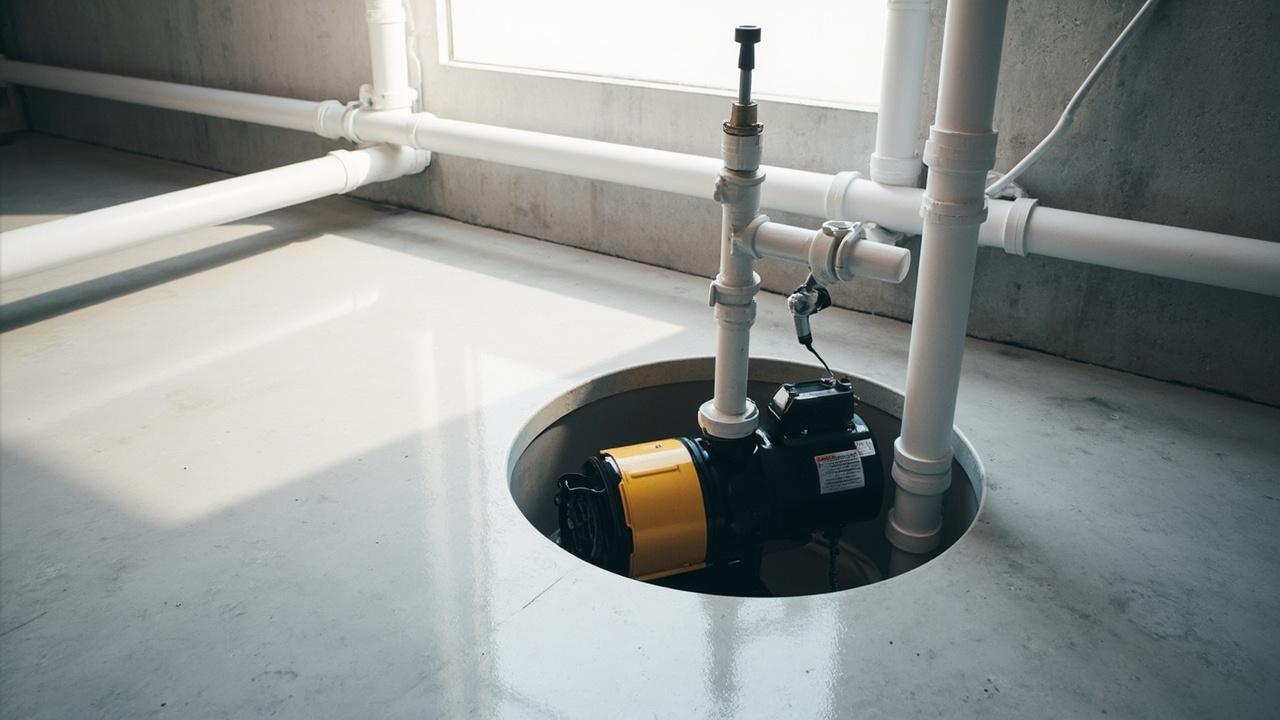

A sump pump installed correctly keeps water out of a basement that would otherwise flood. Installed incorrectly, it runs but doesn’t protect — and water finds the gap between “it has a pump” and “it keeps the space dry.” The difference is almost always in the details: pit size and depth, check valve orientation, discharge line routing, and a power source that survives an outage.
A sump pump is a small automatic pump installed in a pit dug into the lowest part of a basement or crawlspace. When groundwater rises and fills the pit to a set level, a float switch or pressure sensor turns the pump on, and it pushes water out through a discharge pipe to a safe point outside the foundation. The pump runs only when needed, not continuously, and the pit is sized so each activation removes a meaningful volume of water rather than cycling on and off for every trickle.
Primary sump pump types are pedestal and submersible. A pedestal pump has the motor mounted above the pit on a column, with the impeller at the bottom inside the pit. It’s easier to service because the motor stays dry and accessible, and it typically costs less — $60 to $200 for the pump itself. A submersible pump sits entirely inside the pit, sealed against water, and is quieter and more discreet, but service requires removing it from the pit. Submersible pumps commonly run $100 to $400 depending on horsepower and features. A battery backup sump pump adds a second pump and a battery that takes over when main power fails — important because power outages often accompany the heavy storms that cause flooding. Backup systems typically add $200 to $600 for the pump and battery, plus installation.
Choosing the Right Sump Pump for Your Basement
The pump you need depends on how much water you expect to move, how deep the pit sits, and whether you want the protection of a backup system. Picks that are too small cycle too often and wear out fast. Picks much larger than needed are an unnecessary expense and can be harder on the plumbing.
Pump capacity is measured in gallons per hour (GPH) at a given head height — the vertical distance the pump must lift water. A typical basement sump pump rated around 1/3 horsepower moves roughly 2,000 to 3,000 gallons per hour at low head. For most single-family basements with a moderate water table, that’s sufficient. Homes with higher water tables, larger footprint basements, or known high-volume inflow may need 1/2 horsepower or more, pushing capacity toward 4,000 to 6,000 GPH. The pump curve from the manufacturer tells you the actual flow at your specific head height — the rated GPH at zero head isn’t what the pump delivers once it’s lifting water up and out.
Pit dimensions matter for both pump selection and reliable operation. A standard sump pit is typically 18 to 24 inches in diameter and 24 to 36 inches deep, though existing pits vary. A pit that’s too small fills too quickly and causes short cycling. A pit that’s too shallow — or a pump hung too high — risks water reaching the floor before the pump activates. The float switch needs room to travel; it should activate the pump before water gets high enough to cause damage, and shut off with enough water remaining that the pump doesn’t immediately cycle back on.
Pedestal versus submersible is partly a space and preference decision. Pedestal pumps are easier to service and generally less expensive, and they work well where the pit is accessible and the motor column is acceptable above the pit. Submersible pumps are quieter — the motor is underwater and muffled — and they fit where ceiling space above the pit is tight or where the pump needs to sit deeper. For a finished basement or a pit under a shelf, the quieter submersible is usually worth the extra cost and slightly more involved service access.
Battery backup isn’t optional if power outages are common in your area or if the basement contents are valuable enough that a few hours without pump function would be a serious loss. A backup system has its own pump, a battery (typically a marine or deep-cycle battery, not a standard car battery), and a charger that keeps the battery charged. When main power fails, the backup float switch activates the backup pump. A good backup system also sends an alarm or notification when it runs, so you know the primary power is out.
Sump Pump Installation Steps — in the Right Order
Installing a sump pump is mostly straightforward plumbing, but the order matters. Do the pit and the plumbing before the electrical, and verify the discharge line before you close everything up.
Step 1 — Prepare the pit. If you don’t have an existing pit, dig one in the lowest part of the basement floor, typically 18 to 24 inches across and deep enough that the pump sits with several inches of water above the intake at the pit’s normal low point. A new pit usually needs the concrete broken and excavated, a liner inserted (many codes require a permitable liner rather than an open hole), and the concrete patched around the liner. If an existing pit is in acceptable condition — proper size, not cracked, water-tight — you may only need to clean it and confirm the pump fits.
Step 2 — Set the pump. For a pedestal pump, assemble the column and impeller per the manufacturer’s instructions, set the impeller end into the pit at the designed depth, and secure the motor column to the pit edge or a bracket. For a submersible pump, attach the check valve and any manufacturer-supplied fittings to the pump outlet, lower the pump into the pit on a rope or handle (not by the electrical cord), and position it so the intake sits well below the float activation level but not so low that sediment gets pulled in.
Step 3 — Install the check valve. This is one of the most important parts of the installation and one of the most commonly skipped. The check valve goes on the pump outlet and allows water to flow out but not back in when the pump stops. Without a check valve, the water in the discharge line flows back into the pit when the pump shuts off, and the pump can immediately cycle back on — short cycling that wears the pump and the switch. The check valve must be oriented in the correct direction — flow direction arrow pointing away from the pump. A check valve installed backward does nothing useful.
Step 4 — Connect the discharge pipe. Run a pipe from the check valve outlet up and out of the pit, through the foundation wall or up through the floor and out a wall, to the discharge point outside. Use pipe rated for the application — Schedule 40 PVC is common — and support it so it doesn’t sag or stress the pump connection. The pipe needs a secure connection to the pump outlet (the manufacturer usually specifies the fitting), a check valve, and a path to the outside that doesn’t leak at any joint. A discharge line that leaks inside the wall or floor defeats the purpose.
Step 5 — Route the discharge to a safe outlet. The discharge should land at least 10 to 20 feet from the foundation and discharge onto sloped ground that carries water away from the house. It should not discharge onto a walkway where it creates an icing hazard in freezing climates, onto a neighbor’s property, or into a storm sewer where local codes prohibit it. In cold climates, the discharge line should be buried below the frost line or routed to a protected outlet to prevent freezing, which would block the discharge and render the pump useless.
Step 6 — Provide power safely. The pump needs a dedicated electrical circuit — it draws enough current that sharing a circuit with other loads can trip the breaker and leave the basement unprotected. Local electrical codes almost always require the outlet to be GFCI-protected because the pump and pit are in a damp location. The outlet should be positioned so the pump cord reaches it without strain and so the connection stays above the maximum water level in the pit. Hardwired installations require an electrician and a proper disconnect.
Step 7 — Test the system. Before you consider the installation complete, fill the pit with water and confirm the float activates the pump at a reasonable level, the pump runs and discharges water to the outside outlet, the check valve prevents backflow when the pump stops, and the float resets without immediately re-triggering. Watch for leaks at every fitting. Test the backup system separately if you’ve installed one — a backup that fails when you need it is worse than no backup at all because it gives a false sense of security.
Common Sump Pump Installation Mistakes
Most sump pump failures trace back to a small set of installation errors. Avoiding them is more valuable than buying a more expensive pump.
Skipping the check valve or installing it backward. This is the single most common mistake and the one that causes the most short-cycling complaints. A missing or reversed check valve lets discharge water flow back into the pit after each pump cycle, and the pump kicks right back on. The pump and float wear quickly, and the basement occupant gets the noise of a pump running every few minutes. Always install a check valve, confirm the flow direction arrow points away from the pump, and test that backflow doesn’t trigger immediate re-activation.
Discharge line routed too close to the foundation. If the water discharges right next to the house — a foot or two away — it can run right back into the foundation and the very groundwater problem the pump is meant to solve. The discharge point should be far enough from the foundation that the water drains away, not back toward it. Ten to twenty feet is the typical guidance, and the ground should slope away from the foundation at the discharge point.
Pit too small or pump hung too high or too low. A pit that’s too small fills fast and causes short cycling. A pump hung too high in the pit may not activate until water is dangerously high. A pump hung too low can pull in sediment from the bottom of the pit or run dry if the pit drains below the intake. The float switch travel, the pump intake depth, and the pit volume all need to work together.
No power backup in an area with outages. A primary pump with no backup is a single point of failure, and the failure mode — power loss during a storm — is exactly when you need the pump most. If outages are common where you live, or if the basement holds anything you can’t afford to lose, a battery backup system is worth the added cost and a few hours of installation time.
Letting the discharge line freeze. In cold climates, an exposed or shallow discharge line can freeze solid in winter, blocking the outlet. Once blocked, the pump runs but water has nowhere to go — the pump may burn out, or water backs up into the pit and then the basement. Buried and insulated discharge lines, freeze-proof outlets, or a properly designed yard drain prevent this.
Not testing after installation. A pump that’s installed but never tested may fail the first time it’s actually needed, and that first time is the worst possible moment to discover the problem. Testing fills the pit, watches the float, listens to the pump, checks the discharge at the outlet, and confirms nothing leaks. Run the test, and repeat it seasonally — a sump pump that sits unused for months can develop a stuck float, a failing check valve, or a clogged impeller without obvious warning.
Sump Pump Maintenance and When to Replace
A sump pump that runs reliably for years is the goal, and maintenance is what gets you there. The good news is that sump pump maintenance is simple — but it has to happen, and it has to happen before the pump fails in a storm.
Test the pump regularly. Pour a bucket of water into the pit and confirm the float activates the pump, the pump runs, water discharges to the outlet, and the pump shuts off cleanly. Do this at least seasonally — spring and fall are sensible times — and any time you notice the pump has not run in a long while. A test takes a few minutes and catches problems before they matter.
Clean the pit. Mud, stones, and debris that accumulate in the pit can interfere with the float switch, get pulled into the pump intake, or clog the impeller. A periodic cleanup — scooping out sediment and debris when the pit is empty — keeps the pump running cleanly. The frequency depends on what’s washing into the pit; a pit in a basement with a concrete floor and clean groundwater needs less attention than one where mud or construction debris washes in.
Check the check valve and discharge line. The check valve can fail or stick, and the discharge line can develop a partial clog at the outlet or a leak at a joint. At each test, listen for the check valve closing cleanly and watch that water discharges freely at the outlet. A rattling or chattering check valve, or a discharge that slows or stops, needs attention.
Battery backup maintenance if you have one: test the backup pump the same way as the primary, keep the battery watered (for flooded-cell batteries) or replaced on schedule (batteries have a finite life, typically 3 to 5 years for deep-cycle batteries in this application), and confirm the charger is keeping the battery charged. A dead backup battery in a storm is a discovered problem you don’t want.
Replacement timing. Sump pumps wear out — the motor bearings, the impeller, the switch mechanism all have service lives. A pump that’s running frequently, making unusual noise, running hot, or failing to move water as well as it used to is nearing the end of its service life. Most residential sump pumps last roughly 7 to 10 years with regular use and maintenance, though a pump that runs constantly or cycles very frequently will wear faster. If the pump is old enough that a failure would be a real problem — say, the basement is finished, or you’re in a high-water-table area — consider proactive replacement before it fails rather than waiting for the storm that proves it’s dead.
When to call a professional. If the pit needs to be dug and lined in an existing concrete slab, if the discharge line needs to penetrate the foundation wall and you’re not comfortable doing that, if the electrical work requires a new circuit or hardwiring, or if local code requires permitted work for any of those steps — get a licensed professional. Sump pump installation involves electrical work near water, penetrating the foundation, and often local permitting. Those are not all casual DIY tasks, and a professional installation done right is cheaper than a failed pump and a flooded basement.
Next steps: if you’re evaluating whether your basement needs a sump pump or whether an existing system is adequate, start with a clear picture of the water problem — does water enter at the floor, seep through walls, or rise from the water table — because that determines whether a sump pump is the right solution or whether the problem needs exterior drainage or waterproofing first. For context on how sump pumps fit into the broader plumbing system around the home, see our plumbing system maintenance guide and our article on waterproofing basement cost for the decision framework between interior pump solutions and exterior water management.