
Most interior doors that stick, slam, or leak light are not badly installed. They are perfectly installed into a rough opening that was never checked, or a unit ordered without confirming the opening could accept it.
The gap you are chasing with a block of wood is a symptom of a framing problem. Trimming the door is the last resort, not the first move.
This guide covers installing a prehung interior door, which is a door slab already hanging in its own three-sided frame: hinge jamb, head jamb, and strike jamb, with the hinges already hung. It is the format most DIYers buy, because it arrives as one unit and the hardest work, squaring and hanging the frame, is already done.
If your existing frame is sound and you only need to swap the panel, that is a different procedure. See how to install an interior door slab instead, and start with how to measure an interior door if you are not sure the opening dimensions will accept the unit.
What a Prehung Unit Actually Is, and Why That Changes the Job
Before anything else, it helps to know exactly what arrived in the box, because most beginner mistakes trace back to confusing the unit with its parts.
A prehung unit is three components sold as one. The door slab is the panel that swings. The frame is the hinge jamb, head jamb, strike jamb, and door stop. The hinges arrive already hung on the slab and screwed to the hinge jamb.
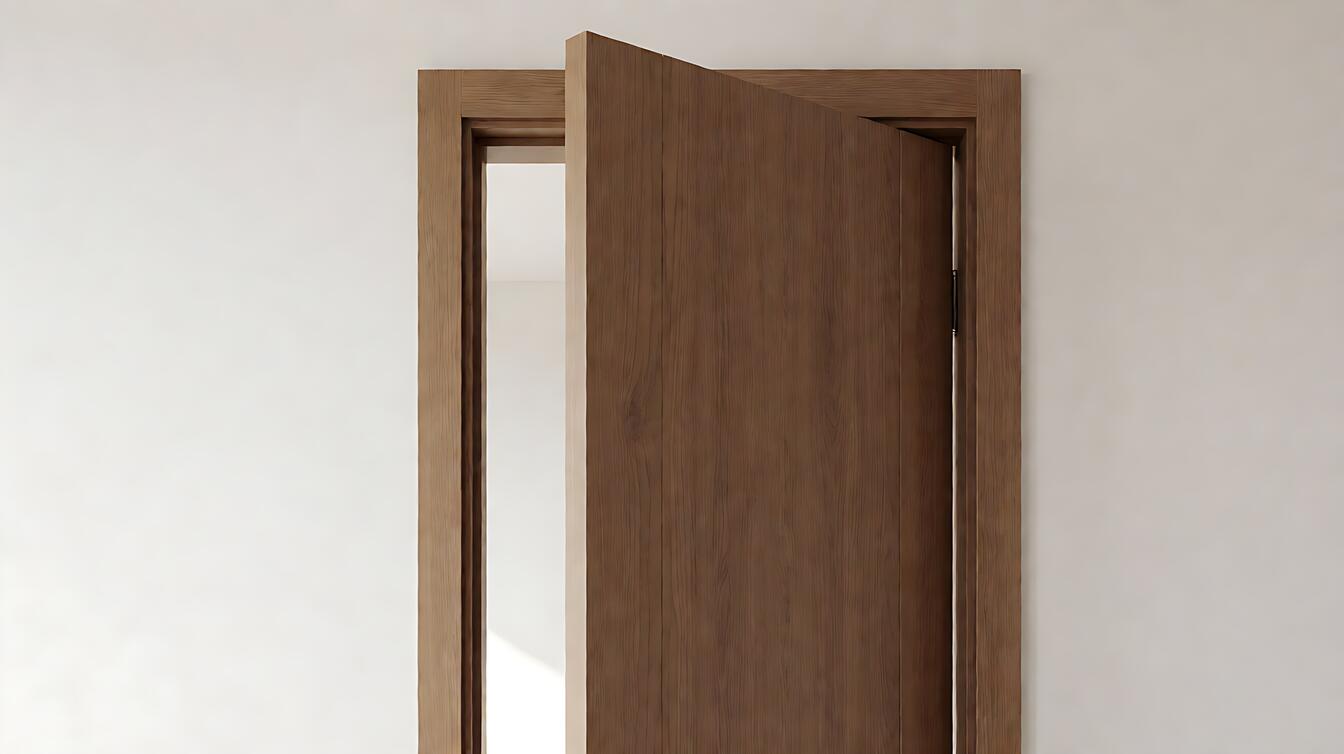
Most units also arrive with a pre-bored lock hole, meaning the round hole for the knob is already drilled. The gap you see between the slab and the frame at the top is not a mistake. It is the hinge-pin relief the manufacturer leaves so you can separate the two halves if you ever need to.
Two details from the manufacturer instruction sheets matter more than they look. The door stop is sized to fit snug against the closed slab, so the door is installed closed against that stop.
The casing is set back slightly from the edge of the jamb, which gives the hinge pins room to be driven out later. If you are building the frame yourself rather than hanging a prehung unit, how to install a door frame covers that work in detail, and how to install door casing and trim handles the last stage. Push the casing tight against the jamb and you will fight the hinge pins every time you need to remove the door.
One more thing worth knowing before you start. The leading edge of an interior slab is beveled, usually by 2 or 3 degrees, so the door can swing past the stop without binding. That bevel is why a slab door closes on the strike side but opens on the hinge side, and it is why a replacement slab with the wrong hand can be unopenable.
The Rough Opening: Where Most Installations Go Wrong
Here is the thing nobody tells you about rough openings: the number you need depends entirely on what you are measuring from, and two of the biggest instruction sheets in the country disagree with each other because of it.
Home Depot’s prehung instruction sheet tells you the rough opening must be 2 inches wider than the door and 2 inches taller. Lowe’s Masonite sheet tells you it must be 1/2 inch wider than the unit and 1/2 inch taller.
Both are correct, because they measure from different points. Home Depot measures from the slab. Lowe’s measures from the outside of the assembled unit, which already includes the jambs.
Get this wrong in the direction of “too small” and the unit will not fit at all. Get it wrong in the other direction and you will have a gap the jamb cannot close, which is a problem you fix with longer jamb stock, a different unit, or by trimming the jambs after the fact.
Before you buy anything, pull the actual rough opening table from the manufacturer of the unit you are buying and work from their numbers, not from a generic rule. If you are picking a unit without a spec sheet in hand, the following is how the sizes relate:
| Nominal door size | Slab size | Unit (OD frame) size | Rough opening |
|---|---|---|---|
| 2/0 (24″) | 24-3/8 x 81-5/8 | 25-1/2 x 81-5/8 | 26 x 82-1/2 |
| 2/4 (28″) | 28-3/8 x 81-5/8 | 29-1/2 x 81-5/8 | 30 x 82-1/2 |
| 2/6 (30″) | 30-3/8 x 81-5/8 | 31-1/2 x 81-5/8 | 32 x 82-1/2 |
| 2/8 (32″) | 32-3/8 x 81-5/8 | 33-1/2 x 81-5/8 | 34 x 82-1/2 |
| 3/0 (36″) | 36-3/8 x 81-5/8 | 37-1/2 x 81-5/8 | 38 x 82-1/2 |
The pattern is worth internalizing because it explains the whole chart: the slab is about 1-1/4 inches narrower than its nominal call-out size, the unit adds the jambs back on, and the rough opening is the largest of the three. A 28-inch nominal door is a 28-3/8 inch slab, not a 28 inch slab, and it needs a 30 inch opening.
Also check the jamb depth against your wall thickness. Standard jamb stock is 4-9/16 inches for a 2×4 wall and 6-9/16 inches for a 2×6 wall, both assuming drywall on both faces.
If your wall is thicker than the jamb, the casing will not sit flat against it no matter how carefully you install the door. This is the most common reason a correctly installed door reveals a gap around the casing, and it is a purchasing error, not an installation error.
When your wall does not match standard jamb stock, a split jamb is the usual answer. A split jamb is one jamb cut lengthwise so you can slide the two halves around the wall thickness and adjust the fit on site.
This Old House notes a split jamb can absorb a stud wall that is up to half an inch out of plumb, and Home Depot sells split-jamb units specifically for this reason.
One more dimension belongs on the list here, and it is the one that trips people up when ordering: handedness. The Masonite and Home Depot instruction sheets define it simply: when the door opens toward you and the knob is on the left, it is a left-hand door, and when the knob is on the right, a right-hand door.
The catch is that handedness is used inconsistently across the trade. Some suppliers add a second word for the hinge side, others for the lock side, and the same supplier may use different conventions on different product lines.
Worse, a second convention names the same door by its hinge side instead of its handle side, which gives you the opposite answer for the identical door. Getting it backwards produces a door that opens the wrong way and, for a slab, a door that will not close.
So order by description rather than by the label. Instead of answering “left-hand or right-hand,” tell the supplier which side you want the knob on when you are opening the door toward you. That sentence removes the ambiguity every time, because it describes the door instead of naming a category that means different things to different sellers.
Manufacturers are blunt about this. The Lowe’s slab instruction sheet states plainly: do not install unless the jamb meets the stated conditions. That same discipline on a prehung unit saves you from a half-finished opening with a door in it that will never work right.
- Is the threshold level? Check the floor across the opening. If the hinge side sits lower than the strike side, the door will bind no matter how well it is shimmed.
- Is the hinge side of the rough opening plumb? Use a 4-foot level on edge against the stud. This is the single most important check, because everything hinges from that side.
- Is the head square to the hinge side? Measure from the hinge jamb to the head at both ends. If they differ, the opening is out of square and the frame will fight you.
- Are the framing walls in the same plane? Hang a string diagonally across the opening and check it against the face of the framing. If the walls are out of plane, the casing will not sit flat, and no amount of shimming fixes it.
If the opening fails any of these, fix the opening. Adding a stud, planing a stud, or shimming the framing to plumb is smaller work than hanging a door into a bad opening and then trimming the door to compensate.

Installing the Unit, Step by Step
Once the opening passes inspection, the install itself is straightforward. Work in this order and stop to verify at each checkpoint.
- Set the unit into the opening, bottom first. Slide it in and stand it on the floor. The unit carries its own weight on the floor, which is why the bottom goes in first. Check the fit before you touch a nail.
- Shim the hinge side and check plumb. Drive wooden shims between the jamb and the framing stud at the hinge jamb, working from the middle outward. Re-check plumb with the level after every shim. This is the step to slow down on.
- Fasten the hinge side first. Starting about 6 inches from the top, drive an 8d finishing nail through the jamb and into the shim behind it. Add a second nail about 6 inches from the bottom and a third in the middle. Leave the nail heads slightly proud so you can withdraw them later if you need to move the frame.
- Shim and fasten the strike side. Repeat the process on the lock side: shim, check plumb, then nail through the jamb and shim at 6 inches from the top, 6 inches from the bottom, and at the strike location. Every nail goes through a shim, not just into the jamb. A jamb nailed tight without shims behind it bows, and a bowed jamb is why doors bind.
- Secure the header. Shim above the head jamb and fasten with 16d finishing nails through the shims. Again, leave the heads slightly proud, then countersink them once you are sure the frame is square.
- Check the reveal all the way around. With the door closed, the gap between slab and frame should be even from top to bottom. If it is not, pull the nails from the top or bottom of the frame and tap the frame over until the gap evens out, then re-nail. This adjustment is expected, not a sign of failure.
- Trim the bottom to the floor. The slab is shipped with extra length. Cut it so it clears the finished floor by about 3/4 inch for hardwood, or less if carpet will be installed later. Use a straightedge and a fine-toothed saw, and support the slab so it does not splinter.
- Set the door stops and casing. The stops should fit snug against the closed slab, holding the door closed while you work. Set the casing back slightly from the jamb edge to preserve hinge pin clearance.
That sequence is the standard order across the major manufacturer sheets. Hinge side first is not a stylistic preference. Fasten the strike side first and then discover the hinge side needs to move, and you have already pinned the frame in a wrong position.
Clearances and Fasteners: The Numbers Worth Memorizing
No single reference assembles the tolerances a working door needs, so here they are gathered with the source that states each one. These are not building code requirements. They are the values that the manufacturer sheets and the best-known how-to guides converge on, and they are what you check your work against.
| Detail | Target | Source |
|---|---|---|
| Rough opening, measured from the unit | 1/2 inch wider and 1/2 inch taller | Lowe’s Masonite prehung sheet |
| Rough opening, measured from the slab | 2 inches wider and 2 inches taller | Home Depot prehung sheet |
| Horizontal reveal, slab to frame | 1/8 to 3/16 inch | This Old House |
| Leading edge clearance at the strike jamb | A consistent 1/8 inch | This Old House |
| Gap between slab edge and door stop | 3/16 inch | Family Handyman |
| Clearance under the door for floor covering | 1/2 inch | Family Handyman |
| Shim adjustment increment | 1/8 inch | This Old House |
| Fastening the jambs | 8d finish nails | Lowe’s Masonite prehung sheet |
| Fastening the head jamb | 16d finish nails | Lowe’s Masonite prehung sheet |
| Top hinge, long screw into the trimmer | 2-1/2 inch or longer | This Old House, Ask the Builder |
| Door storage distance from a heat register | At least 10 feet | Lowe’s Masonite prehung sheet |
The reveal is the number you will check most often, and it is worth understanding what you are looking at. The reveal is the gap you see when the door is closed, between the slab edge and the frame.
Read it down the hinge side, then across the top, then down the strike side. If those three measurements do not match, the door will not feel right, even if it latches.
There is one more fastener rule that is easy to miss and worth its own line. Do not nail the head jamb tightly. That jamb needs to be able to move slightly as the wood expands and contracts across the seasons, and nailing it solid is a common cause of the door cracking or binding a year later.
Shimming: the detail that separates a working door from a frustrating one
Shims are cheap wood wedges, and they are the mechanism that lets you correct a framing irregularity without cutting anything. The rule from the manufacturer sheets is simple and absolute: every nail goes through a shim, on all three sides.
The reason is structural. A jamb nailed tight against a stud that is not perfectly plumb does not become plumb. It bows, and the bow shows up as a door that binds at the latch corner and gaps at the top.
Shimming is how you move the jamb into plumb before you lock it in place.
Use tapered shims and pair them at each location, driving them together so they do not rock. Work from the middle of the jamb outward, re-checking plumb as you go.
On the head jamb, shim in the middle first, then at both ends. The head is the piece most likely to bow under the weight of the unit.
When a shim pack will not hold plumb, This Old House’s fix is worth knowing: add a third shim to the standard opposed pair and slide it back and forth under the other two to change their angle.
A shim pack that rocks is a shim pack that will not hold a nail, and it will show up later as a door that has gone out of square.
Shim behind all three hinges and at the strike plate, not just at the jambs generally. Those are the four points that carry the load, and they are the four points that will move if the frame is not supported.
Shims are adjusted in roughly 1/8 inch increments, so if you are correcting a gap in that range, that is the size of move to make.
There is a diagnostic worth learning here. MasterCraft publishes a plumb test that uses a 4-foot 6-inch level on edge against each jamb in turn, moving the level until the bubble sits perfectly centered to read how far the jamb must move.
Their observation is worth remembering. A door that is out of plumb typically appears to be pulling away from the jamb and into the room. If your installed door leans that way, the fix is at the frame, not the slab.
When the Opening Is Wrong: Adjust It or Change the Plan
Real houses are not perfectly square, and this is where a prehung install either succeeds or turns into an afternoon of forcing. There are three situations, and each has a different answer.
The opening is slightly out of square. If the discrepancy is small, shimming the hinge side and letting the unit’s own rigidity pull the frame square works. Move the hinge jamb into plumb, then re-measure the head. This is the most common case and it usually resolves with shims alone.
The opening is significantly out of square or the hinge jamb is badly out of plumb. Adjust the framing. Add a shim or a full stud behind the hinge jamb to bring it into plumb, then hang the unit. It is more work up front and considerably less work than a door that will never close properly.
The wall is thicker than the jamb depth. This is not fixable by installation. You need either longer jamb stock, a jamb built up with a strip, or a unit with a deeper jamb. If the casing cannot reach the wall surface, no amount of shimming and no amount of trimming will make it look right.
The floor is not level across the opening. This is the most common problem in real houses and the one most competitors handle in a single sentence. If the hinge side sits lower than the strike side, the door will bind at the top corner no matter how carefully it is shimmed, because the frame and the swing are pulling against each other.
The answer depends on how uneven the floor is and what is going to happen to it afterward. For a small difference, shim the low side of the frame so the unit sits level, which keeps the hinge jamb plumb while the swing side rises.
For a larger difference, you have two choices, and they are genuinely different jobs. You can scribe the jamb to follow the floor, which is fussy work and only correct if the finished floor is final. Or you can let the door clear a saddle that covers the gap, which is the standard answer in a room where the flooring is not yet decided.
The key thing is to know the finished floor height before you cut anything. The Lowe’s entry door instructions make the point explicitly: determine what the actual finish floor height will be before installation and adjust the rough opening if needed. Scribe now against a subfloor that will be covered in vinyl, and the door will drag on the day the vinyl goes down.
The decision rule: if the framing can be corrected with a shim, correct the framing. If the defect is in the product dimensions, correct the order. Do not try to solve a dimensional problem with a saw.
Two manufacturer requirements are easy to miss, and both cause real problems.
Two manufacturer requirements are easy to miss and both cause real problems.
Store the door properly before you install it. Masonite’s instructions call for keeping the unit at least 10 feet from heating registers, away from direct sunlight, and installing it only in a building that is not damp or freshly drywalled.
Wood doors are moisture-sensitive, and a unit that absorbed moisture in a humid storage space and then dried out after installation can bow. This is also why the slab instructions call for acclimating a door to the prevailing humidity and temperature for at least 48 hours before hanging.
Finish all six sides of a slab. If you are trimming or modifying the panel, seal the top, bottom, and both edges with the same number of coats you put on the face. An unfinished edge is where a door absorbs moisture first, and hollow-core doors warp for that reason.
On the hardware, most prehung units arrive with the lock hole already bored. The standard boring is a 2-1/8 inch lock hole with a 2-3/8 inch backset, which is the configuration almost every interior knob and lever on the shelf is made for.
If your unit does not have the bore, check the latch bore diameter before buying hardware. It has to match the lock you pick.
Tools, Materials, and the Details That Come Up Later
From the manufacturer tool lists, here is the honest minimum for a prehung install.
- Level, 24 inches minimum, and a 24-inch framing square
- Hammer and a nail set for driving finish nails below the surface
- Wooden shims, a flat pack of them, more than you think you need
- 8d and 16d finishing nails, plus a Phillips screwdriver
- Putty knife and wood filler for the nail holes
- Fine-toothed saw or a jig for cutting the slab bottom, plus a straightedge
- Safety glasses, and a dust mask if you are cutting MDF or composite stock
Add a door lifter or a pair of wedges for the slab weight, and expect to spend more time shimming than cutting. That is normal, and it is a sign you are doing it correctly.
Testing the result, and knowing when to stop
Before you trim and case the job, test it. Open and close the door three times, slowly, watching the reveal gap all the way down the latch side.
Then check three specific things:
- The gap is even. Top, middle, and bottom should match on both the hinge and strike sides.
- It closes quietly and stays closed. A door that swings itself open has a frame issue, not a hardware issue.
- The latch bolt enters the strike freely. It should drop into the strike plate by hand with no force. If it binds, the strike plate position is off, and moving the plate is a five-minute fix that saves an afternoon.
If the door rubs, binds, or will not latch, diagnose the cause properly before you start cutting. The full symptom-to-cause walk-through is in how to fix an interior door that won’t close. A door that will not latch is usually a strike plate or hinge problem, not a slab problem, and trimming the panel to fix a latch issue is the most common way to turn a five-minute repair into a replacement.
If the whole job is bigger than one door and you are weighing whether to hire someone, DIY vs professional renovation sets out the cost and skill trade-offs honestly.
One last note on scope. Interior doors are usually the visible face of a bigger project. If you are replacing a whole set, coordinating the swing directions so hinged doors do not collide with a drawer or a wall is worth doing on paper first.
The windows and doors guide covers how interior and exterior doors fit together in a wider renovation. Window and door installation cost breaks down what a multi-door project runs.